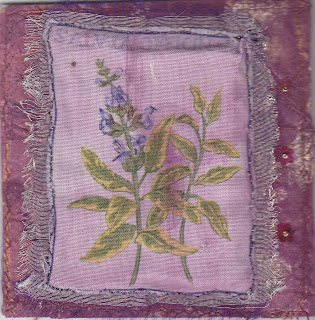
I made this fabric heart hanging for another swap on UK. I started off with some fabric paper which was almost white, not very inspiring, so I painted it with Golden Fluid Acrylic, Irridescent Gold. I was a bit heavy handed and didn't like it at all, so applied a thin coat of gesso and then wiped it straight off with a baby wipe. Much better! I added some Treasure Gold , Amethyst to highlight the creases. I then used another piece of fabric paper for the mount, and free-machine stitched with a metallic thread, and satin stiched around the edges with varigated thread. The heart was made from yet another piece of fabric paper and stitched around with metallic thread, and edged with gold Krylon. Tiny flowers were punched from scraps of the papers and attached with a small bead to the corners of the mount, which was stuck onto the background using Golden Regular Gel Medium. I attached the embellishment to the heart, again with small beads.
The darker small tags,with the hearts, were made from scraps of the fabric paper. The lighter coloured tags were made using painted bondaweb, ironed on. The tags were attached using eyelets and ribbon.
Friday 17 September 2010
Beads
 I had to do a swap incorporating beads. It could be anything at all as long as it used beads.Whilst I was on a short break in Devon I had picked up several of these hanging 'Live' at a car boot sale. Just right for altering!
 I first of all removed the wire and painted it with cinnamon Viva metal paint, and when it was dry painted again with Viva olive green metal.When it was dry I stamped it with Versamark using a scroll stamp, and heat embossed using fine detail gold. I did this on both sides. I threaded some gold wire though the holes to make a hanger, and using small beads threaded onto Nymo wove them through the wire. Hope my swap partner likes it.
Tuesday 14 September 2010
Tags
I was to make either 4 normal size tags or one large one for a swap, but got a little carried away!
I used ordinary white tags, sprayed on both sides with walnut ink and I then added some Jo Sonja's iridescent turquoise. I stamped on one side of the tag with 'time' images and used the masking technique to add words, both in chocolate Brilliance Ink. The back I stamped and embossed with fine gold. I added the embellishments and the flower from my stash.
Um 4 tags finished, but I wasn't particularly satisfied with them. I decided to add quotes related to time to the front of each tag. I printed these out on acetate and cut into a tag shape. I then used two bigger tags to make the covers. I coloured them in the same way,stamped words and added an acetate clock to the front. I then stamped the insides with a texture stamp, put them on a ring and added fibres to finish.
Paper Bag Books
I have participated in 2 paper bag book swaps recently. The participants made pages which were sent to the hostess for distribution. All participants were responsible for putting their own book together. The first book was entitled Nature.
My cover and spine. Made with a paper bag coloured using the credit card technique.
Our second book was on Leonardo da Vinci
My pages
A Trio of Canvases
 A Canvas, a transferred image, silk paper, a pipe cleaner, some wire and some beads.
I made this canvas for a metal swap. I used moulding paste on the canvas and pressed into it with a texture stamp. When it was dry I coloured it with some spilt inks from when I coloured the metal squares and a little treasure gold to highlight .I used embossing folders on 3 of the metal squares and on the one with the flower I used metal embossing tools. The flower was punched from metal. The squares were all coloured with Spirit Inks (similar to alcohol inks )used for wood staining, and mixed with meths.
Canvas was covered with various mediums and texture stamps used. When dry it was coloured with acrylics and highlighted with treasure gold, well actually pewter I think! The jigsaw pieces were coloured with the same paints and the embellishments were from my stash.
Thank you
Thank you all for your nice comments, either on here or elsewhere. Blogger seems to have a few hiccups at the moment! I have a few more things I want to blog, and I must say it has been great revisiting earlier work. Some things I had forgotten about. For those of you who asked I will get the Folding book instructions out as soon as I can, possibly at the end of this week.
I have one pressing swap which is giving me a headache lol...I have NO idea what I am going to produce for it. Stand up Margaret lol
More ATCs( with a difference.)
A set of hanging ATCs for a swap. Images are covered with organza to give a softer look.
I needed to produce something using fabric for a swap and (with thanks to Linda Baldock) I made this folding ATC. The 3 pieces are mounted on a piece of organza,
Framed Inches
 I took part in an inchie swap on UKArts in which the colours to use were, soft blues, greens and white with a touch of glitter. I loved all the ones I received and just happened to have a frame which was an ideal size to display them. I used my favourite Heavy Acrylic, Transparent Burnt Umber for the frame and highlighted with a little treasure gold.
Experiments
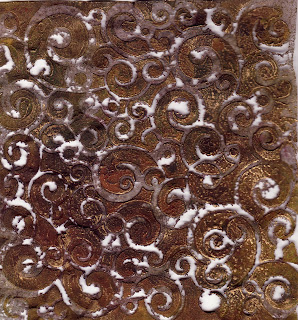
Experiments, don't we just luv 'em! Lots of failed ones and sometimes wonderful results that you wonder how on earth you will ever be able to incorporate into your work. Here are a couple I liked a lot, but haven't really used. Have to get my thinking cap on. This piece is made from lutrador. I used a stencil and applied a thin layer of moulding paste. I sprayed with colour whilst the moulding paste was wet, waited for it to dry ( I am usually to impatient to wait, but for this it was important to do so!) I then zapped it with my hotter heat gun, which is a 350w Creative Craft Tool, brilliant for fabric zapping. The result as you see is a lacy effect. I used some treasure gold lightly to highlight.
 This piece is made from lutrador. I used a stencil and applied a thin layer of moulding paste. I sprayed with colour whilst the moulding paste was wet, waited for it to dry ( I am usually to impatient to wait, but for this it was important to do so!) I then zapped it with my hotter heat gun, which is a 350w Creative Craft Tool, brilliant for fabric zapping. The result as you see is a lacy effect. I used some treasure gold lightly to highlight.
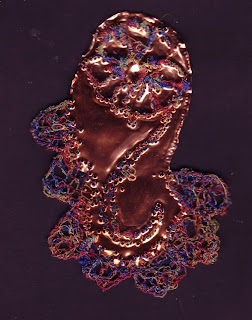
 This was done at a class I attended, Stitching on Metal. It was a fun class and I love the lacy effect that I learnt to do around the edges. I started off with a piece of copper metal and a piece of stabiliser which I stamped with the flower stamp, chosen because of its simplicity lol. The whole lot was placed in an embroidery ring , stabiliser on top, and stitched with the feed dogs down. You need to do this the opposite way to free embroidery i.e slow machine! I then drew a rough scallop pattern on some cold water dissolvable stabiliser, and randomly stitched within the pattern, making sure to catch the edges of the metal and to leave no loose ends.
Labels:
Lutrador,
machine stitching,
metal tape,
molding paste,
stencil,
treasure gold
Monday 13 September 2010
Meander Books
This was a great swap organised by Adrienne. Each player made 2 pages for each of the other players to their chosen theme. For the pages we used canvas and pelmet vilene. Once the pages were sent to participants it was up to each individual to make them into the books, and finish the back if desired. My themes were 'Play on Words' and 'Birds'.
Art Quilt Squares
A collaborative art quilt swap. Each participant had to make 2 4x4 quilt squares for each swapper, to that swapper's given theme. Here are the squares I made.
Sunday 12 September 2010
Brocade Notebook
Not material again! Nope this brocade is very different. It is made from polymer clay. I had a piece of embellished wools that had a couple of contrasting threads embellished on it, and I thought it would be great to use it for a book cover if I could get the brocade right!
It is actually fairly easy to do. You need to get your clay conditioned ' and roll out with a pasta machine or the Wizard will work if you don't have a pasta machine. Paint clay with a metallic paint very thinly. Allow paint to dry and paint again very thinly. Do this 4 or 5 times . Dust your chosen stamp and impress into the clay, roll it once with a rolling pin. Now add another colour or two to the raised image and roll flat. Cook according to directions on the clay packet. A melt pot works brilliantly ;)
My book cover was made using my clay piece and on the back I stamped and embossed the same stamp.
Subscribe to:
Posts (Atom)


